CSS Transform: Rotating a 3D object with perspective based on mouse position
I was inspired to write this post because I saw a cool animation somewhere and wanted to know how it worked. Looking at the code revealed it was is just some very basic math used to calculate the rotation of an object relative to the mouse position.
rotateX = -(mouseY - element.y - (element.height / 2))
rotateY = mouseX - element.x - (element.width / 2)
The code above is just calculating the number of degrees to rotate an object based on the X and Y position of the mouse and the position and size of an element (relative to the viewport) causing it to “face” or “follow” the mouse position.
What do I mean by “face” the mouse?
See the Pen Follow Mouse Example by Armando Canals (@armandocanals) on CodePen.
We can see the box in the center rotates towards the mouse on the screen. This effect uses the CSS transform property with the perspective,rotateX and rotateY transform functions.
perspective(), rotateX() and rotateY()
The perspective() transform function specifies a perspective projection matrix. This CSS function is interesting, and you can read more in the spec, but the short of it is that it creates a visual depth for the user. The lower a given value to perspective() the more pronounced the perspective effect, while larger values have a more moderate effect.
According to the CSS 3D Transforms Module Level 3 Spec, the rotateX() and rotateY() CSS functions rotate elements around their horizontal (X) and vertical (Y) axis, respectively.
Specifically, it says these functions “specify a clockwise rotation by the given angle about [their respective axes].”
Positive values rotate the object clockwise, and negative ones rotate counter-clockwise. Pretty straightforward.
How can we calculate rotateX and rotateY?
Calculating the degree of the rotation of the object along the X and Y axes can be done by using its center point and the X, Y position of the mouse within the viewport. Let’s take a look at a basic scene depicting a box inside a viewport:
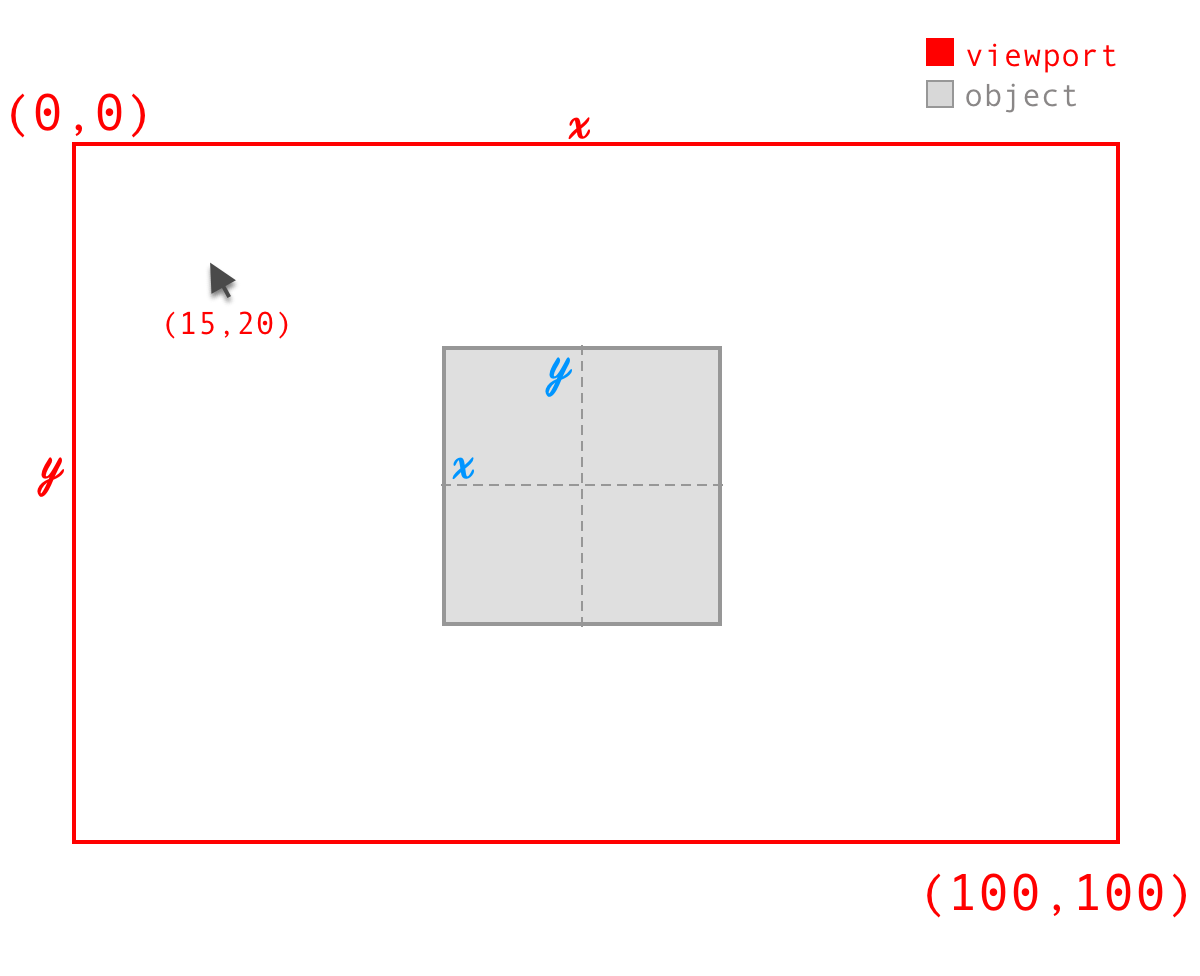
The red line in this example represents the viewport. We can see the viewport has a starting point in the upper left at (0,0) and ends at the bottom right at (100,100). These values correspond to the X and Y axes of the viewport.
We can also see we have a mouse in the viewport with a specific coordinate position.
In the center, we have the object within the viewport which has its X and Y axes. Using the mouse position within the viewport and the position of the object, we can calculate the degrees we need to rotate the object on its axes to get our desired effect.
Important note: the rotations happen around the object’s axes, meaning that rotateX rotates around the X-axis, and rotateY rotates around the Y-axis.
See the Pen Rotate x/y example by Armando Canals (@armandocanals) on CodePen.
Calculating degrees of rotation
First, we need to figure out how to calculate the number of degrees to rotate for each axis such that we get the desired effect when moving the mouse.
Using this basic scene example, let’s get our bearings and find the center points of our object.
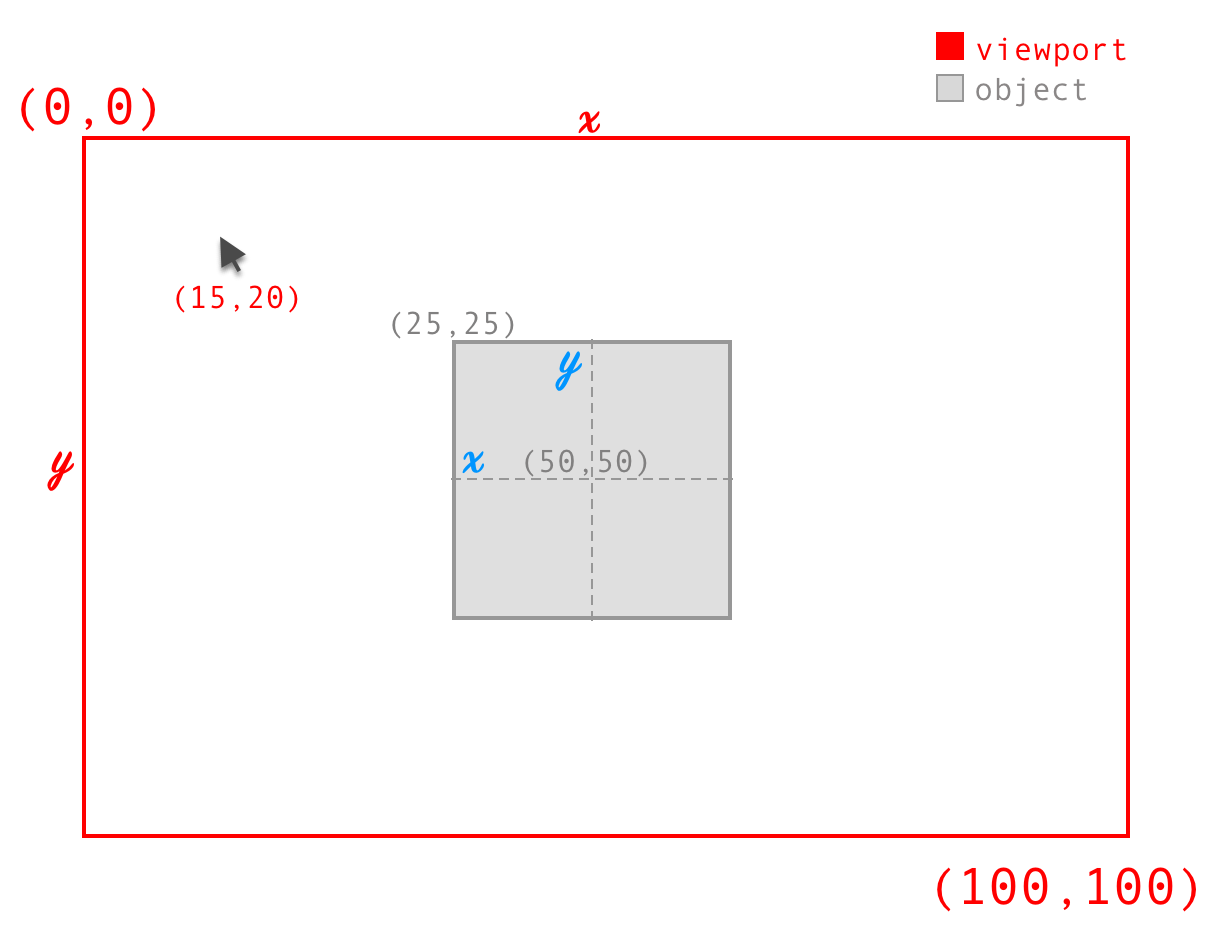
Now that we have the center let’s think about how to find this (X, Y) pair and what we want to do with it.
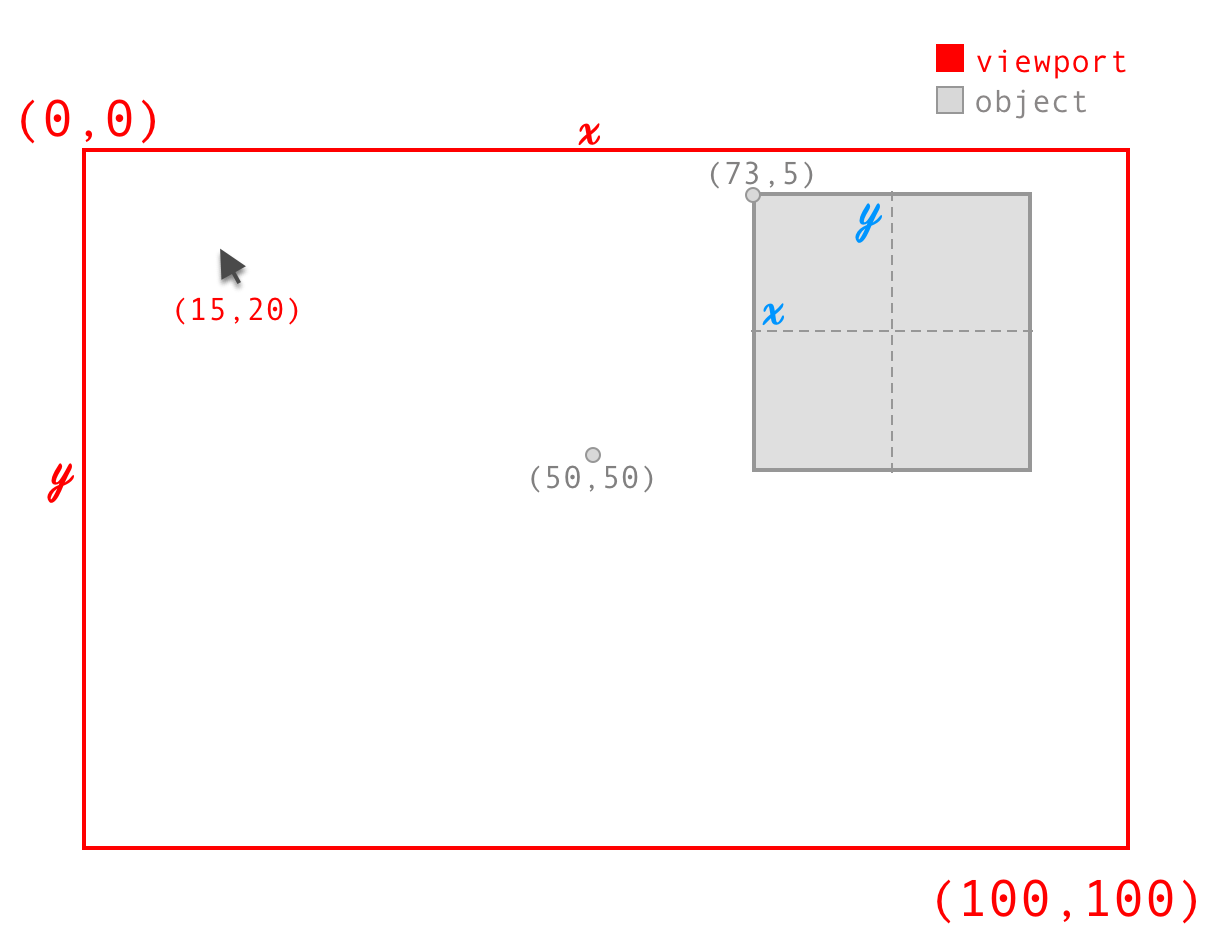
At first, it might look like we want to use the center of the viewport as a base to calculate the rotations. However, what if we move the object in the viewport?
See the Pen Object with centered perspective by Armando Canals (@armandocanals) on CodePen.
If we move the object in the example, we’ll see it rotate, but the point of reference is in the center of the viewport, which is not what we want.
Instead, we want to calculate from the center of the object, which (not surprisingly) is also its default transform-origin property.

See the Pen Object with individual perspective by Armando Canals (@armandocanals) on CodePen.
We can see that now the object rotates relative to its center point.
Getting the center of the object using element.getBoundingClientRect()
A neat way of getting the position of an element on the page is to use the getBoundingClientRect() method. Calling this method on a DOM element returns a DOMRect object containing the elements size and position relative to the viewport.
This method gives us what we need to find the center of our element from any position on the viewport.
Let’s get the DOMRect object:
box = document.getElementById("box-el").getBoundingClientRect();See the Pen getBoundingClientRect example by Armando Canals (@armandocanals) on CodePen.
Calculate rotateY
We’re rotating the box on its own X and Y axis which might seem confusing at first when calculating the rotation using the X and Y of the mouse. We’ll see this next.
Let’s figure out a rotation for the Y-axis of the object. To do this, we’re going to need to get the X value for the mouse and subtract it from the center point of the object, relative to the X position and width of the object.
rotateY = mouseX - box.x - (box.width / 2)
This is somewhat confusing since moving the X-axis with the mouse rotates the box on its Y axis.
Awesome. Now if we have the mouse in the center of the object, our rotateY is 0 degrees. If we apply this to the Y-axis, can see that we somewhat get the desired effect.
See the Pen Y without constraint by Armando Canals (@armandocanals) on CodePen.
The object moves in the right direction, but its rotations are incrementing in proportion to its size and not the size of the viewport.
For example, consider the object on the screen with a mouse centered on it. The rotateY value would be (0,0). Now we start to move the mouse to the right on the X-axis, the rotateY value would change very quickly.
So, a movement equal to the width of the object would cause a 90deg rotation which is more than we want to rotate.
Constrain the rotation
To fix this, we want to constrain the rotation proportional to the perspective of the object and size of the screen. Doing this is fairly straight forward.
const constraint = 20;
rotateY = (mouseX - box.x - (box.width / 2)) / constraint
What this is doing is taking the number of degrees we’ve shifted on the X-axis away from the center of the object and dividing it by 20.
For example, if we move to the right on the X-axis equal to the width of the object, the rotation would be 4.5deg instead of the 90deg we got before.
Constraining the rotation gives us a more “natural” movement in the viewport.
See the Pen Y with constraint by Armando Canals (@armandocanals) on CodePen.
Calculate rotateX
Now, let’s figure out the rotation for the X-axis of the box. This step is very similar to calculating the rotation for the Y-axis of the box.
We’re going to take the Y value of the mouse and subtract it from the center point of the object, relative to the Y position and height of the object.
rotateX = mouseY - box.y - (box.height / 2) / constraint
So, let’s apply these values to our box and see what happens next.
See the Pen X without inversion by Armando Canals (@armandocanals) on CodePen.
We can see the image shifted along its Y-axis correctly, but the X-axis seems to move inversely to the Y position of the mouse. This behavior is because we’re using the value of mouse Y while it’s above the object’s center point, which comes out to a negative integer.
Invert the X-axis
We want to return a positive integer for the X rotation when the mouse is above the center point to get the desired effect on the box.
So, lets re-calculate:
rotateX = -(mouseY - box.y - (box.height / 2)) / constraint
See the Pen X with inversion by Armando Canals (@armandocanals) on CodePen.
Now that we have both rotations for the object’s axes, we can apply both of them at the same time to get the desired effect.
See the Pen Follow Mouse Example by Armando Canals (@armandocanals) on CodePen.
Conclusion
You can do a lot of cool things with CSS transform functions. I hope this helps you understand a bit more about how 3D rotations work and how to calculate custom rotations for elements based on the position of other objects in the viewport.
Thanks for reading!
If you have questions or issues with this post, you can email me at armandocanals@gmail.com.